Creating Fabric Hearts, Pt 2: Stitching the Base
In part two of creating fabric hearts, I laid out steps for its base. The second part will focus on stitching and stitching supplies for it. You'll learn how to mark your fabric for stitching and stitching itself.
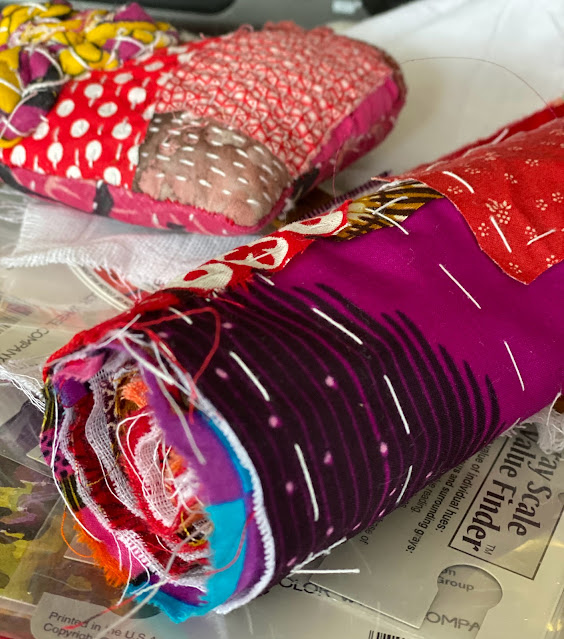
Notice I keep the base rolled up to save space. Once I finish my prep, I store it in a basket or bag.
Materials Needed
- Fabric base
- Marking pen (Pastel pencil, chaco ace pen, Clover fine white marking Pen, or Clover white chaco liner)
- Long needle with a wide eye
- Painter tape, 1/4" or variety pack of different widths
- White all-purpose thread, Perle #8, Sashiko, or Sulky #12 spool, or Sulky Metallic
- Fiskar's acrylic ruler
- Optional: Beeswax, quilt pins, threader, circle template for quilting
Marking the Fabric
- You can stitch straight across or combine it with waves and circles.
- I mark with either the Clover white chaco liner or pastel pencil on the fabric side using the clear, acrylic ruler as your guide or tape a line with 1/4" masking tape.
- You also can rule a line with a pink chaco ace pen, but stitch evenly on the reserve side, so the ink doesn't show. I haven't found it disappears; however, it will wash out.
- I mark with masking tape for stitching straight across and sew along the edge. If you use masking tape, it only sticks once. So, I reuse it by pinning it. Works fine. Saves money.
- I may add some circles drawing around a quilt template. You can achieve the same effect by drawing around a glass or working freehand.

Stitching
- The thread you work with determines the surface pattern. I like ridges and valleys, so I use a single strand, Perle 8, or Sashiko threads. However, both can pull on your wrist after a while. To avoid tendinitis, I sometimes work with Sulky #12. It glides through the fabric easier than a thicker thread.

- For this particular piece, I'm using an all-purpose thread to economize. I noticed a single strand, though, doesn't give me the texture I like. So, I will tighten my tension to make the ridges and valleys I like.
- I knot my thread at the end of a row but work over three or four stitches in the middle. I take one backstitch to hold it down.

- Generally, I work with smaller stitches. However, I lengthen them if I sew fabric with wax or lettering. Wax it first to ease the glide if your needle doesn't want to go through a piece of fabric.
- Some people use an embroidery hoop, I do not since I want the slight pucker. Occasionally, I hoop my fabric when stitching with circles, so the middle doesn't puff up. It depends on the material.
Tips
- Do use a long needle with a wider eye. The longer length allows you to pick up three or four stitches at a time.
- You will need a threader for a thicker thread for a narrow eye.
- Work with about an arm's length of thread.
- You can begin along the edge with your first row or in the middle. Start where you feel comfortable. The first row at the fabric edge can pose a challenge since you don't have much fabric to hold.
- I remove my basting as I do along to see how my rows line up.
Parting Words
Use what you have. To make multiple hearts, you don't want to spend much money. God wants us to be good stewards of what He has given us.
Please enjoy stitching. While I try and make all my stitches of equal length, I am not always successful. In my opinion, I'm alright with it since it lends to the pattern. However, I don't want my stitching to look sloppy. Sometimes, I will pull out a row and restitch it. Don't give up if you don't like your stitching. Take a breath and keep going. The beauty of the fabric hearts comes with embellishments that can hide mistakes. All is well!
Pray as you work through each step, asking His Spirit to guide your hand. Also, I pray for direction on recipients and how to distribute them.
Jan Paron, PhD
January 1, 2022
Next: Creating Fabric Hearts, Pt. 3: Three Versions of Hearts
"Therefore if any man be in Christ, he is a new creature: old things are passed away; behold, all things are become new" (2 For 5:17 KJV).


Comments
Post a Comment