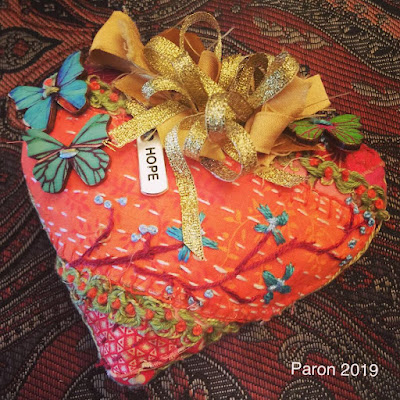
Creating Fabric Hearts, Pt 1: Preparation
The purpose of sewing fabric hearts lies in ministering the Word. The hearts have multiple uses. They can accompany prayer, create a memorial from the fabric of a loved one, and evangelize the Gospel. It's a means of using God-given gifts for the Kingdom.
Creating fabric hearts should not break the bank. Instead, look for ways to use what you have on hand. Be creative mixing different types and weights of fabric. For example, I took pieces of various African fabrics I had stored for many years and combined them with material from my scrap bag for this particular base.
Further, don't feel rushed to prepare your base. The preparation and later stitching process can move along as fast as you prefer. I prefer contemplative sewing, of which I meditate on the Lord pray for His guidance. Like the artisans of the tabernacle, I keep myself wise-hearted for God's wisdom.
Materials Needed
- Material scraps from either store ends, second-hand purchases, or upcycled clothing
- White or cream color, all-purpose thread (I prefer cotton.)
- Double gauze, muslin, or old sheet for backing
- Embroidery scissors and larger fabric shears
- Straight pins or safety pins
Your finished fabric base should contain three layers of fabric: (1) double gauze or other soft material, (2) first layer of scraps, and (3) second layer of scraps. In essence, you will create a type of Boro-style piece of collaged fabric. Below you'll see images of a completed fabric base.
Fabric base ready for Sashiko stitching
Layer One
- Spread out the first layer of either double gauze, muslin, or other soft fabric. My piece measures about 9" x 2 1/2' since I cut out several hearts at one time. But, you can begin with a smaller piece. A 12" x 12" fabric base provides ample room for several hearts.
Layer Two
- Decide on your color scheme. I chose red and orange-red highlighted with red's complement of blue-green.
- Cut out larger pieces for layer one, 3" x 4" depending on the size of your base.
- Begin placing the fabric swatches on the gauze overlapping one with the other. Aim for a 1/4" overlap. -- No need to turn the fabric under. Allow the fabric edges to create dimension.
- After you cover the gauze with fabric, take a step back to see if the base looks color balanced. If not, move the pieces around until it appears good to the eye.
- Pin in place, and then baste--One smaller stitch on the underside and larger on top. I run the baste lines across and return to stitch down any sides that pop up.
- Note: Don't use a fabric glue stick to tack down the pieces, so your needle doesn't meet with resistance to the glue later.
Layer Two: Material Layout
Layer Three
- After basting the second layer material, add smaller fabric pieces to break up the larger ones. Place them strategically to create variation, but also don't cover material design you want to keep for later.
- Baste the layer two pieces down.
Layer Three--Material basted in place
Spot Checking
- The first three steps complete your base preparation.
- Let it sit for a while and then return to it to make sure the colors and fabric mesh together.
- I plan to return to my piece to add some velvet and satin fabric pieces for interest.
Watch for Creating Fabric Hearts, Part 2: Sashiko Stitching. I'll review sewing products, demonstrate how to stitch, and provide some tips for sewing straight lines in the next post.
I am looking for others who will join me in making what I call healing heart to minister for the Kingdom. If you are interested please comment below or contact me through the form on the website. Send the finished heart and how you used it and I'll post it on the website.
God bless and guide your hands with every stitch you take!
Jan Paron, PhD
December 31, 2021
"but those who hope in the LORD will renew their strength. They will soar on wings like eagles; they will run and not grow weary, they will walk and not be faint" (Is 40:31 NKJV).


Comments
Post a Comment