Scripture Art Card Friday: The Lord is My Shepherd
"The LORD is my shepherd; I shall not want: (PS 23:1 KJV).
July 2, 2015 | Jan Paron

Psalm 23 has brought comfort to the believers' heart throughout the Church age. Certainly, I frequently recited and prayed this psalm myself over the years in times of lamentation or crisis. However, did you know it has a broader, messianic theme that uncovers the Coming One? The psalm along with the immediate adjoining foretell events of the Messiah: the Good Shepherd in death (22), the Great Shepherd in resurrection (23) and Chief Shepherd in glory upon His millennial Kingdom reign (24). In fact, one sees Christ in the Book of Psalms.
When I was a young girl, my grandmother gave me a mini Bible containing the New Testament and Book of Psalms. I wondered why it included the latter. As I delved into the Psalms later I understood that it not only reaches the human soul, but also foretells the coming Savior. Jesus told His disciples, "that all things must be fulfilled, which were written in the law of Moses, and in the prophets, and in the psalms, concerning me" (Luke 24:44).
Yes, Psalm 23 does comfort believers. As we see birth-pang developments, the psalms give us peace and reassurance in messianic witness of redemption foretold. It reminds us of the promises fulfilled and those to come of the good news of the Gospel in Jesus Christ.
The Lord is My Shepherd Scripture Card
By far, more people request this card than any others. Note: I make 12 of these Scripture cards at a time in assembly style fashion, laying them on two different cookie trays as I work. Don't be daunted by the number of steps. After you do it with one or two cards, you automatically know the steps--It becomes second nature.
Supplies
If you don't have all my supplies improvise. Use my methods as a launch for ideas of your one. This particular card morphed over time. As you can see from the below picture, I change up the design.
Do consider the audience. I might dress it with tulle and fancy ribbon or plain wire. Other times, I brighten it up with a high gloss medium. Most important to remember, if you bring these to someone ill or with allergies, don't use glitter or finishing spray to avoid any adverse reaction.

- Non-stick silicone baker's mat (You can use a heat or glue gun on this mat and not melt it.)
- Empty cereal box
- Index card (3" x 5")
- Scissors
- Pallet knife.
- Acrylic paints: true red, sizzling red ultra fine glitter paint, cadmium yellow, yellow ochre
- Red glitter paper scrap and a black patterned washi tape
- Ranger distress paints: black soot
- Ranger distress ink: black soot, fired brick
- Red banana fiber yarn (From Etsy)
- Corner punch (or cut the corners yourself)
- Notebook hole reinforcers
- Homemade template for small tag or punch
- Collage pauge instant decoupage matte (This lasts a long time.)
- Acrylic finishing spray gloss (Keep it light...A little goes a long way)
- Liquitex professional black gesso or black paint
- Lord is My Shepherd Pic (Bing, License Free to Share and Use)
Directions
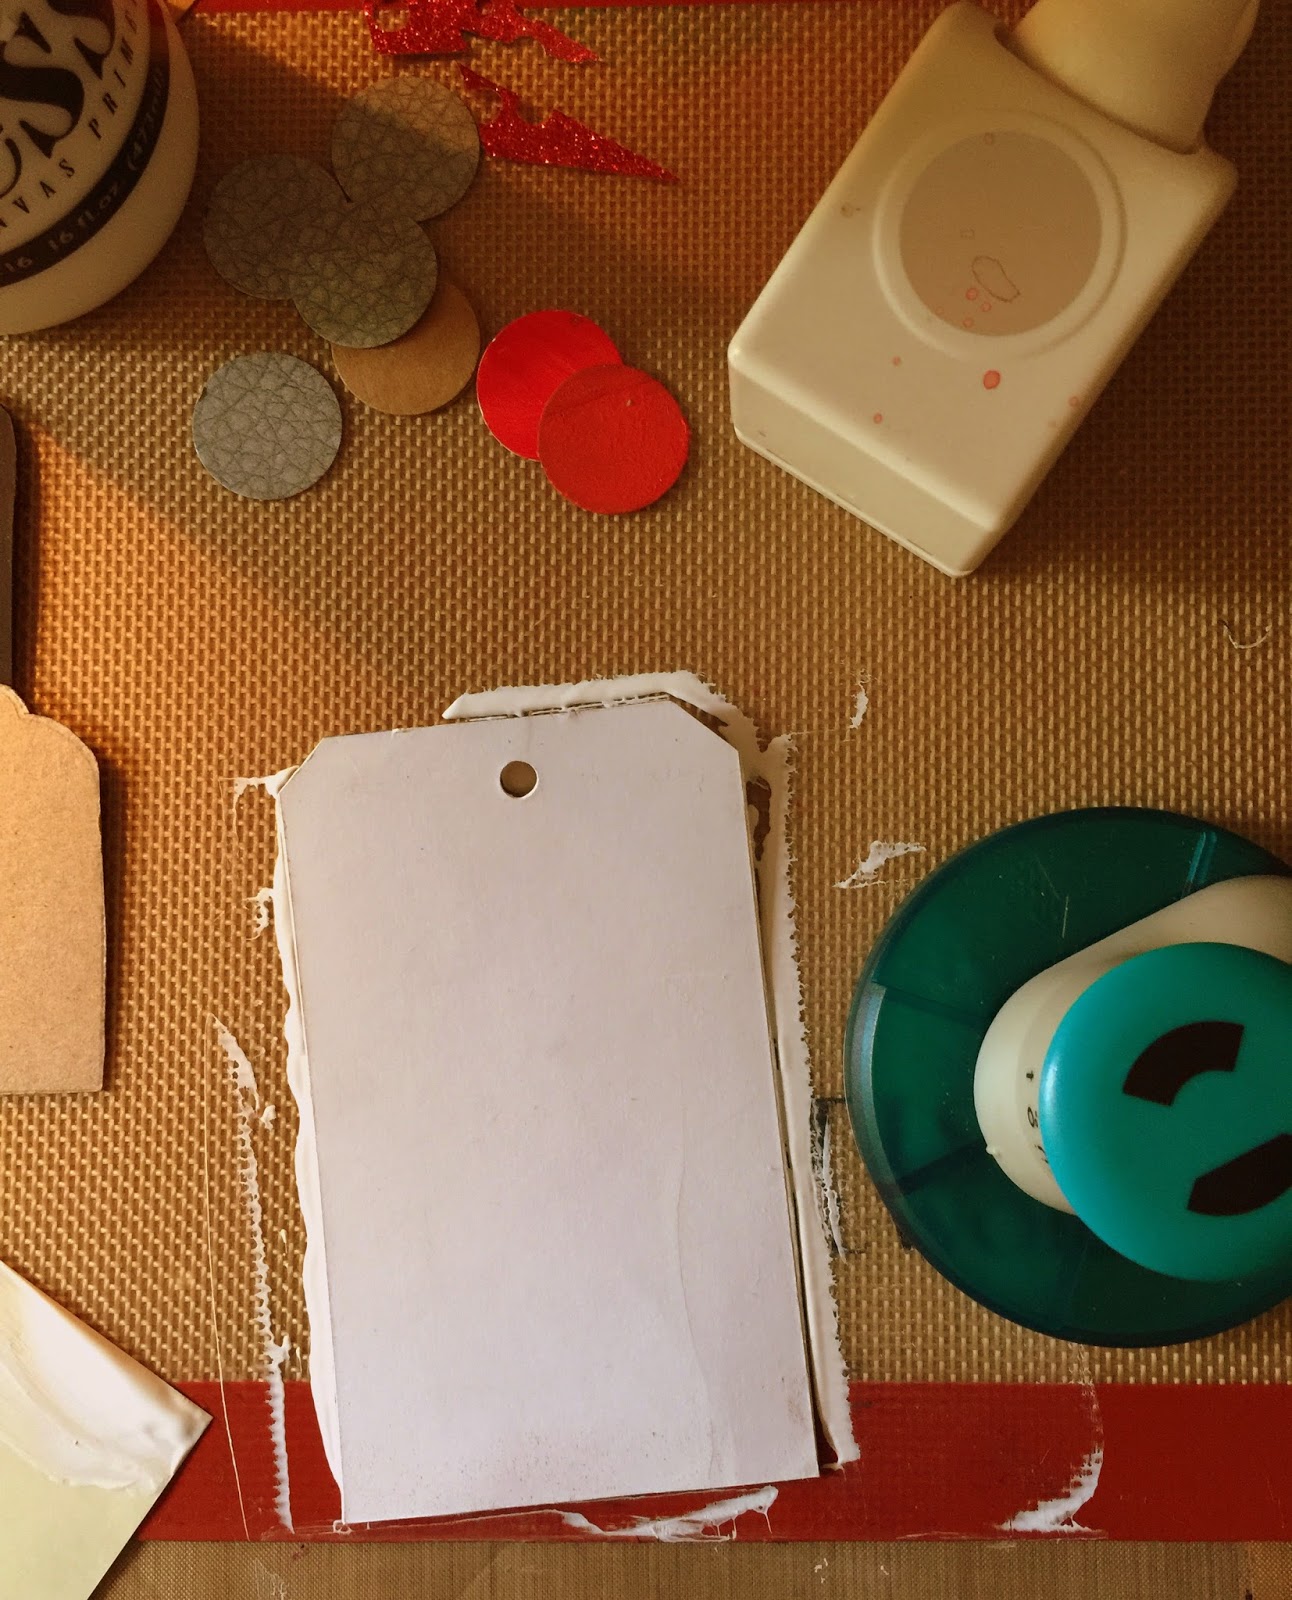
Step 1
- Trace an index card on the pictured side of a cereal box, and cut around it. Then, glue the two pieces together with an Elmer's glue stick. Coat both side with white gesso. When it dries, angle the corners and punch a hole at the top.
- While you wait for it to dry, punch out a circle and tag from the cereal box scrapes. (I made my own tag template because I couldn't find the size I wanted.)
Step 2
- Since my lettering is not the greatest, I scanned a prior card, sized it to the tag, and glued the lettering to the tag. I believe I fit twelve on a sheet of paper.
- I also ran off copies of the shepherd and sheep.

Step 3
- To prevent the printer ink from smearing, I rub a light coat of Collage Pauge Instant Decoupage Matte with my finger. Don't overwork it or it smears. I actually tossed two because I did just that.

Step 4
- Paint your card with acrylics true red, sizzling red ultra fine glitter paint, cadmium yellow, and yellow ochre. I like red in the top right and bottom left areas. Last, I paint the glitter paint over the true red.
- Flatten your card under a book in between wax paper for a bit.
- Add the hole reinforcer either before or after you paint the card. I adhered mine before and ended up darkening it.

Step 5
- Glue the shepherd to the bottom, and add your favorite black patterned washi tape over it at the bottom edge.
- Using your palette knife, spread a light amount of translucent embossing paste over the Punchinella piece or stencil to the right and left sides of the card. The translucent paste locks in the color and gives texture.
- Let it air dry. The heat gun will buckle it.

Step 6
- Glue on the Lord is My Shepherd image, the circle, and a bit of glitter paper. If you don't have glitter paper, use some other red scrap or red glitter glue.

Step 7
- Use a Sharpie to draw in a little design at the top corners of the tag, as well as the cross and lettering in the circle. Then, use the white Signo pen around the circle's edge. Let it dry well.
- Spray a light coat of sealer.
- Go around the card edges with a Sharpie, and then distress these same edges with Ranger distress black soot paint. Wipe off to your liking.
- You can use black soot distress ink around the card, but do it with a Q-tip for control. What you don't like will wipe of because you previously sealed it.

Step 8
- Dab Mod Podge sparkle with your finger. Don't rub off the distress paint.

Step 9
- When the Mod Podge Sparkle dries, dribble a couple lines of red ink down the top right of the card.
- Tilt the card to make the ink run.

Step 10
- Spray with sealant.
- Wipe (dab with a pad) Ranger distress fired brick.
- Paint the back with true red. Edge it with the black soot distress paint.

Step 11 (Last step)
- Let it dry well. You either can seal it with Dorland's wax, another coat of spray or Golden polymer medium gloss. I did all three to keep the glitter from rubbing off. Each time you add a sealer, though, it slightly darkens the color.


Thank you for sharing this Jan! Love the directions, so easy to follow!
ReplyDeleteThanks, Debbie! I didn't realize how many steps go into a Scripture card until I broke it down. It was quite enlightening for me as the artist to go back and review the preparation that went into the card so I could improve upon the process. Blessings, Jan
Delete